Artists of all kinds—whether you’re a painter, illustrator, or graphic designer—before you can start selling high-quality prints of your work, you need to capture it correctly.
If budget allows, hiring a professional photographer is the easiest way to ensure accurate colors and sharp details.
But if you prefer to do it yourself, it’s entirely possible with the right equipment and techniques.
Lighting
Lighting is the most crucial factor to get right from the start.
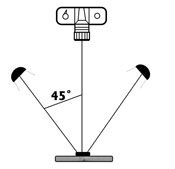
In professional photography, this setup is known as “copy lighting”. It involves placing two lights on opposite sides of the artwork at a 45-degree angle to ensure even illumination and eliminate shadows.

If natural light isn’t an option, using an artificial light source is a great alternative. A simple work lamp can provide a well-lit environment for photographing your artwork.
To soften harsh lighting, place a sheet of diffusion material in front of the lamp. You can also hold a white surface, like a piece of foam core, opposite the light source to reflect light into the shadows and create a more balanced illumination.
Capturing the photo: DSLR vs. smartphone
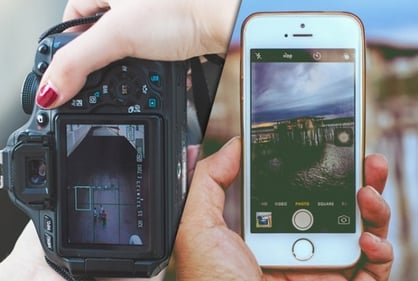
While a high-quality camera, such as a DSLR or mirrorless model, can give you full control over settings and lens choices, you don’t necessarily need expensive gear to get great results.
Newer-generation smartphones have advanced cameras that can capture sharp, high-resolution images—usually more than enough for creating professional prints.
If you’re using a smartphone, follow these steps to ensure the best results:

1. Use the highest resolution setting
Most modern smartphones allow you to adjust the resolution. Go to your camera settings and ensure you’re shooting at the highest possible resolution (often labeled as “High Efficiency” or “Pro Mode” on some devices).
4. Keep the lens clean
A smudge or dust on your phone’s camera lens can reduce image sharpness. Wipe it with a microfiber cloth before shooting.
5. Stabilize your phone
Even slight movement can blur details. Use a tripod or rest your phone on a steady surface to keep it stable. If using a tripod, set a timer or use a remote shutter release to minimize vibrations.
6. Frame your shot correctly
Hold the phone parallel to the artwork to avoid distortion. Use the built-in grid lines (found in camera settings) to align your shot and ensure the artwork is straight.
7. Tap to focus and adjust exposure
Before taking the shot, tap on the artwork to ensure proper focus. If the image appears too dark or bright, adjust the exposure manually by sliding the brightness bar that appears when tapping the screen.
8. Shoot in RAW (if possible)
Some smartphones support RAW format, which captures more detail and gives you better flexibility for editing. If your phone has this option, enable it in the camera settings.
By following these steps, you can achieve high-quality images with your phone—often rivaling those taken with professional cameras. The key is proper lighting, stability, and using the right settings to capture the best possible image for printing.
Editing your photos
Now that you know how to photograph paintings you can begin editing those photos to get the best representation for what the painting looks like in person.
Adobe Photoshop and Lightroom are popular professional tools for adjusting colors, contrast, and brightness. They do come with a cost and a bit of a learning curve, but with time, they make it easy to fine-tune your images for print.
If you’re looking for a free alternative, VSCO is a great option. While it’s known for its filters, it also has powerful manual editing tools that allow you to correct colors and enhance your artwork without over-editing.
After downloading VSCO on iOS or Android (or use it online), import your artwork photo and go straight to the editing tools.
Adjusting brightness and contrast will help balance the image, while the white balance settings can correct any unwanted color shifts.
If your photo looks too warm with a yellowish tint, sliding the temperature toward blue can neutralize it. If it appears too cool and bluish, adjusting it slightly toward yellow can help. The tint slider can further refine the colors by removing green or magenta casts.
Upscaling for larger prints
Even if you use a high-quality camera or set your resolution to the maximum, the final image may still not be large enough for some of our bigger print sizes. In these cases, you can use an AI upscaler to increase the resolution without compromising quality.
AI upscalers use advanced algorithms to enhance details and enlarge images while maintaining sharpness. Many online tools offer free or paid AI upscaling services. Some popular options include:
These platforms allow you to upload your image and choose how much to upscale it. For best results, use an AI upscaler before finalising your print file to ensure the highest possible quality.